Friday, April 21, 2017

You.com

Reflection

Click here to view my website on Weebly!

I've never created a Digital Portfolio before, and I'm only 89% convinced that I know what is entails. I visited About.me, Wix, and Visualize Me before settling on Weebly. Weebly seemed like a great tool to use with many features that'll allow the user to customize their website to their liking, all the while, not appearing too overwhelming. Navigating through the site was as simple as creating an account. After I created the account, I started reflecting on what it means to have a Digital Portfolio on myself. Thinking about what I want people to know about me, what I want to share, was a big ordeal. On my website, I created pages based on my identity today--what makes me, me. I'm a teacher, student, and mother, and I wanted to speak about all the three components in my life that has allowed me to evolve into the person I am today.

On my "My Story" page, I gave a brief overview on who I am, my educational background, and my teaching experience. Then I worked on "The Educator" page, and I started writing about myself as a teacher. Here is when I experienced my first challenge because of course, nothing is simple with me. The website was not saving my writings. Whenever I would write something on the page, it'll auto-save (as I thought), and when I left the page and returned later, it'll all be gone; I started copying and pasting my work in a Word Document just in case. I contacted Customer Service through Live Chat, and after about 32 minutes, he (Trevor) recommended when I finished typing my text, to exit the site immediately and then return to the page in an attempt to trick Weebly into auto-saving my written words before the session timed out; he had no idea how to help me otherwise, but surmised the problem was with my computer timing me out due to a cache. After some time and several attempts, my words started to save. On this page, I focused on Web 2.0 tools this year that I tried for the first time, and it made a difference. I shared some of my flyers on Smore.com, an image of Google Hangouts (even though my Google Voice has all my updated calls and messages), and I also shared one of the presentations I used on NearPod. These tools that I used throughout the year has impacted my role as an educator tremendously.

Bianca "The Student" was the next page, and I was wondering what I wanted to incorporate on this page for the longest. I literally revisited all of my past courses through Live.Wilkes and explored some of my projects; many of my projects where papers or items (images/graphs/tables) sent through Microsoft Word. I was really interested in the projects I completed online using Web 2.0 tools and applications, so I picked three courses (Digital Media; Impact Learning Environment; Internet Tools for Teaching) where I felt I created the most projects and decided to share several pieces on my website. These projects included those using Powtoon; Thinglink; Adobe Sparks; Livestream. While creating this page, I ran into a technical issue with embedding codes into my page, so I just refreshed the website, left it alone for about 15 minutes, and revisited it again to finish. I shared my entire Adobe Sparks page because I created so many pieces in that course, it would've been incredibly time consuming to incorporate both my videos and all those projects on my page from that one course. I tried to share enough projects of mine without going overboard or cluttering my website. I also made sure I provided some context on the work I was sharing on my website. I was not sure if I went into enough detail on each course description, but this is my first Digital Portfolio and I'm always going back in and editing; I;ve actually edited my website over 6 times after publishing it!


The last two pages I created are titled "The Mother" and "Social Media." I didn't go into much detail on "The Mother" page, but if someone wants to know me, then they should know I'm a mother before anything else. It was important for me to talk about my children since they are my greatest motivators--to continue teaching and to finish graduate school. I have those two to thank for everything, and I want visitors to know about my two miracles. Now, I'm not social media savvy. It took me years to create a Facebook account after it came out. I don't use Instagram, SnapChat, Twitter, Youtube, etc. I only use Facebook. I decided to turn my last page into a blog in hopes that every month I could add a monthly post on my favorite Facebook posts; my Facebook is private, so visitors won't see much if they went there themselves. The Slideshow featured showcases snapshots of my favorite posts of the month.

This final project was a reflective piece in itself. It truly allowed me to think about my own Digital Dossier over the years, and how the many projects I've created represents myself. I know in the past two years alone, I've created many blogs for assignments and used other Web 2.0 tools too--I simply can't remember them now. During my undergrad, I remember I created my first blog on WordPress, and I often think about that blog and revisit it sometimes; you might be able to view it if you do a search on Bianca Bradwell's Twilight review. My point is, I've created so many projects online, and I wish I had a Digital Portfolio back then to track everything. I also felt it especially important to talk about my personal life on my portfolio since it help viewers understand the author more. I intend to continue using my Digital Portfolio after this class is over mainly so that I have a platform to revisit my works and update with new projects.

Sunday, April 16, 2017

Broadcast Yourself!

To say this assignment was a challenge is an understatement. The best way to document this experiment is to divide my experience from the beginning, middle, and ending process.

The Beginning
On Wednesday and Thursday I could not decide if I wanted to do a personal or educational topic. Wednesday I decided to discuss a personal topic, and contemplated discussing my role as a mother or something pertaining to healthy foods etc. By Thursday, I was not sold on discussing a personal topic because I figured those who were family and friends of mine--people I expected to actually respond or take notice to my Live-streaming session, would already know my feeling and outlooks on the personal topics in my life; I'm pretty much an open book. I was frustrated by Thursday night because I was having trouble picking my topic and the week was close to an end. I'm usually not indecisive...believe me! It was Friday morning and I thought well, let me at least brainstorm on some educational topics I'm willing to discuss; for some reason online learning kept coming to mind. I wanted to talk about something that encompassed me as a virtual teacher because I feel like many people don't come across us and ask us some burning questions they have about cyber schools when given the opportunity. When strangers find out I'm a virtual teacher, they become so curious about my role and hound me with questions about our educational system. So, since I was leaning toward the topic of online learning. I decided to go with that topic after all, and created a Facebook post announcing my broadcasting event; I also posted this event on my blog and sent notifications through group text messages on my phone. I momentarily contemplated creating an Event on Facebook, but I thought, "I don't want to put people in the awkward position of saying yes, no, or maybe to my event." I know that feeling of saying "no" to something and then feeling like you need to explain why you could not attend. I simply created a Post and made it very casual.


Okay, so here was the fun part (insert sarcasm). I could not decide which platform to use at the same time I was having conflict over my topic. After reviewing some ideas from my instructor and asking around, I settled on these three: iPadio, Livestream, and Adobe Connect. Now, I already had an account with iPadio; I had to create an account with iPadio and do a Podcast for a previous class 2 months ago. Though I had an account with iPadio, I never explored the tool. There was so much about this tool that I did not know and still had no idea how to orchestrate. When I hit "Create Broadcast," they kept asking me to upload an audio, so I was stuck on that aspect. I figured those who wanted to listen to my Live Broadcast would probably have to call the number listed and enter my 4 digit pin, but I was not sure. Because I was so conflicted, I decided to put iPadio on the back-burner.


I moved on to Livestream and created an account next; it was a fairly easy process. Once I was in my account, I went to the Dashboard and hit 
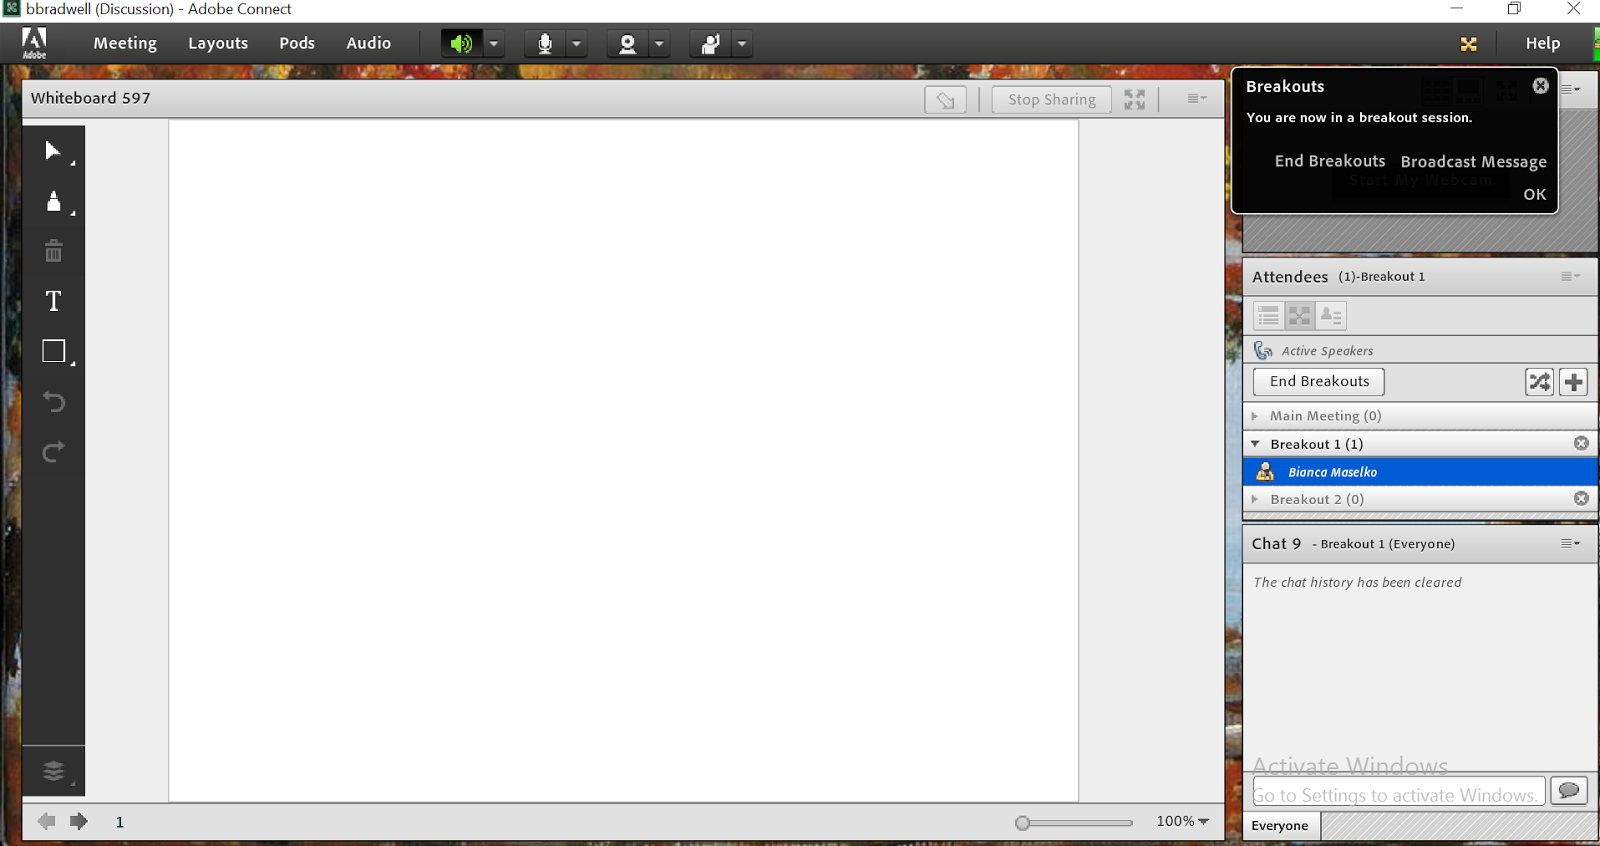
Create An Event. I titled the event Online Learning. I set the date and time, and saved everything. "Now what" I said. I could see where the Share tool was located (it was a link), but I had no idea how I would go Live-streaming from there. After playing around with the tool for awhile with no luck, I decided to put Live-stream on the other back-burner while I searched around for other platforms before settling; now because I'm extra, I did search for tutorials and read some articles/blogs on both iPadio and Livestream, and was still confused. I totally think it's just me. While those two options were cooking, I came across Adobe Connect. Now, my school just started using Adobe Connect this year, but after poking around the website and then creating my account, I learned there was a difference between Adobe Connect Meetings, Webinar, and Learning. Knowing my school (my very frugal school) and our capabilities in this system, I know we have the Adobe Connect Meetings version. Adobe Connect Webinar and Learning differ in the sense that they offer everything Adobe Connect Meetings has, including much more. I chose Adobe Connect Webinar thinking that would be the best option for this assignment, and I was excited to see what other features were available; Adobe Connect Learning--reading it's description, seemed pretty cool. I have to be honest, I've never explored Adobe Connect all year. We're given a link, told to record LiveLessons, and then upload them to our Message Boards in our LMS system. Teachers don't create anything or manipulate anything, so I wanted to use this opportunity to learn more about this system I've been using all year. Since the setup and the creating of my Online Learning event was so simple, I said to myself, "Well, okay looks like I'm going with Adobe Connect." My trial was for 30 days, and I could have at least 25 members in the room. Everything was gravy... or so I thought.

                                                                           Livestream
                                                                         Adobe Connect 

The Middle
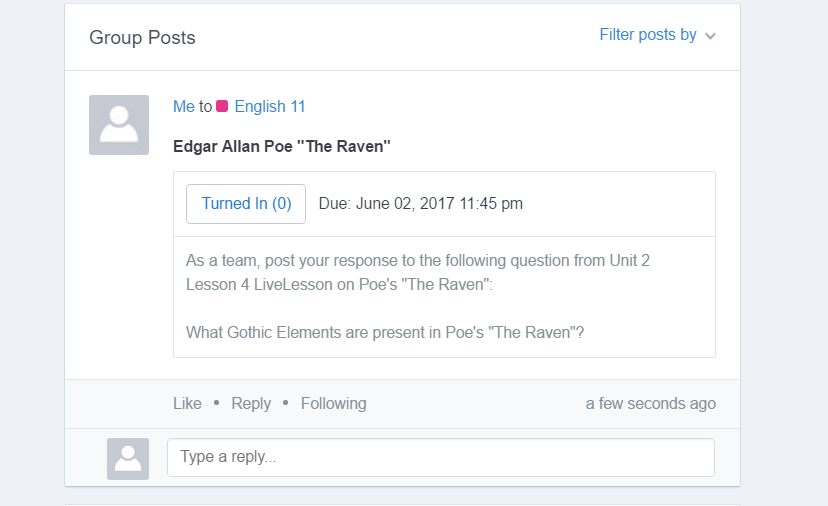
The next step was creating my presentation for the live broadcast. Since I had the option to share my screen and or upload documents, at first I decided to create a presentation using Prezi (I've had an account with Prezi since forever). While gathering data on The Benefits of Online Learning, I changed my mind somewhere down the line and decided to go with Microsoft PowerPoint; a couple of months ago every teacher's computer was upgraded, including the installation of the new Windows 10 software, so a part of me wanted to see the difference in Microsoft PowerPoint. It was actually pretty neat. I created my PowerPoint on "The Benefits of Online Learning," nothing fancy, and then I setup my room. I was ready; one thing I noticed different about this room and the one I use at work,was the addition of the Engagement Meter Pod--which was nice to have. I opened my room around 11: 30 am, and was awaiting the attendees; I made sure I had the settings changed to "Anyone with this url can enter the room."


So it was time. Around 11:45am, I started getting messages through Facebook and through my phone from people asking about some Adobe Connect Add-On that they had to download prior to coming to my live broadcast. I assured them that that sounds reasonable, and that it probably was better than having to create an account themselves. Well, then the real problem came. Everyone, and I mean everyone, who was trying to enter my room and contacted me, told me that they kept getting this message:

"The user has exceed their limit. Please contact the administrator" (something to this effect)

Of course this was crazy. I was allowed 25 individuals in my room. One person managed to get in my room Frank Howard--my husband's co-worker. However, upon my delay of starting at 12:00 pm because I was trying to assist others, he left and Tamika Johnson was able to enter. Now there was still just the one person in attendance. After about 30-45 minutes, of re-sending links, re-reading the conditions of my trial, and helping attendees with their questions, I finally realized they were only letting me allow 1 member in the room at a time. I then called Adobe Connect customer service, and the automated response told the caller twice that the agents could not assist those who did not purchase the software; I still attempted to speak with an agent, but the call was dropped. Feeling defeated and really upset (more like pissed), I decided to make a decision. Either go along with my live broadcast with only one person in the room, or find another platform. I chose the latter and decided to quickly return to the tools on the back-burner. Luckily, my family and friends who I was conversing with via Facebook and through text messages were willing to hold out for me to get things in order.

The End
I simply could not figure out iPadio. Again, I think was it was just me. For the longest I was trying to get from their homepage to my personal settings, and realized I had to bit "Beta Admin." I was going in circles with iPadio, and with people waiting on me, I did not have time to figure the basics--especially when I had no clue where to start. That's when I turned to Livestream. Now, I was in my account, and again, I was trying to figure out how to live broadcast--quickly. It took me about 5-7 minutes after clicking around, to realize I had to use a Livestream Producer (this popped up on the right when I clicked Editor, and then Live Tools (I know, seems previous obvious). Well after that, I made sure my PowerPoint was awaiting, along the videos I intended to share.

Honestly, I started, stopped, and re-started this live broadcast at least 8 times! 8 times! Here are the list of issues I ran into: having people entering; the picture (my camera and the screen); loud static noise; no sound at all; an extreme lag. When I hit Live Broadcast, I did not know I could not pause anything, or that my face and screen would immediately be shared. While the live broadcast was going, the very first time, I sent people the link to my Livestream, and everyone said they could enter my live event once they signed up or in using another platform. I'm seriously so grateful for these individuals who worked with me! So I stopped the first broadcast after learning I was being recorded helping others. Silly me! Then there was the issue with juggling the camera and my screen, and figuring out how to view the chat box (by pulling up Livestream on Google) without the shared screen creating some sort of weird tunnel affect; I kept switching between focusing solely on my computer screen, and then visiting the Livestream website to look at the chat box-- you'll note this when viewing my recording. It took awhile to setup everything--hence the starting, stopping, and re-starting process. Then I came across a loud static noise. Everyone else could hear it too! It was extremely loud, and I had no idea how to fix the issue. I kept visiting the Audio tool and adjusted some switch and clicked on things such as Speaker input and Microphone input etc. until I no longer heard the noise. I had no idea what I was doing; not to mention an alert at the bottom of my screen, to the left, notified me if things were streaming correctly or if my CPU was down and recommended closing apps. There was a point when I did not have any sound at all, and then I faced the extreme lag. Now, I remember finding the "enable lag" bottom in the settings and un-checking that box myself. That did not work. To be honest, after working hard to get this live broadcast going for almost 2 hours, I decided to go with the flow. I reviewed the recording afterwards and found some issues--such as no sound during the video clips even though Jessica McNeil could hear them, but I was overall satisfied considering my day. I do remember ending the live broadcast too soon, so I entered the event again to answer questions in the end. That was nice. There were 5 people overall in attendance (Tamika Johnson, Mona Bradwell, Jessica McNeil, Briana Smith, and Cookie Carr), and I was pleased.

                                      Online Learning Event-Finished Broadcast to the Right


Livebroadcasting while checking Livestream--see the tunnel affect on the screen


                                                                               Chat box!


Reflection 
At first I thought to myself, "Well technically, I do a live broadcast every single day during LiveLesson, and I use a webcam and record myself too. This should not be that bad." What I did not factor in was the fact that at least in LiveLesson, I'm covering a topic I've been covering for years, and, I know how to wing awkward technical issues with teenagers as my main audience. These technical issues were bad, and due to the lag, I wasn't able to deliver a powerful presentation because I kept hearing my voice echo in my ears, or the lines I delivered 2 minutes ago, repeat through my headset while I was talking. I was going crazy. Luckily, my audience members said they could not hear those echoes. Would I use this platform again, probably not. I would use something a little less complex. Less is more in my book. I don't want anything fancy. I prefer platforms that have more of a virtual room format--only because it makes me feel like I can control a space, prepare in advance, etc. Even though Livestream is not my favorite, I can't deny this entire experiment was a learning experience, and I learned the power in having back-ups plans in place when things go array.

Livebroadcast recording on The Benefits of Online Learning: 
https://livestream.com/accounts/24776687/events/7269091/videos/154231776


Saturday, April 15, 2017

Live Webinar

I attended a webinar through Discovery Education titled "Introduction to Discover Education Streaming" at 4:00pm. Registration was simple. I received a confirmation email, and then a reminder email with the link to access the webex. Our speaker was Linda Hughitt, who has taught K-8th grade in Oregon for awhile. She has been doing webinars for 3 1/2 years, and has completed over 1,500 to date. Overall, her webinar was very informative, and it was quite apparent that she knew her topic very well. 
  • What were the strengths and weaknesses of the show format?
The strengths with this webinar's format was the tools available for both the presenters and attendees. Both the presenter and attendees could use their microphones, webcams, and the chat box; I liked too as the attendee, the ability to privately contact the host--send her a message or question that was discreet and unseen by the others. Another strength with the webinar's format was the shared-screen option provided so that the attendees had visuals to focus on while the presenter spoke. Another tool available was the Whiteboard, which is nice to have. I don't think there was anything that hindered my experience as an attendee. There were definitely ways in which the presentation could have been better, but the platform Hughitt used for the webinar was great. 


  • Would you participate in future shows of this nature?
I most definitely would participate in future webinars of this nature. I never felt confused in this setting, and I did not have any complications entering the session or using the tools available--at one point my microphone and webcam were both in use. I was even conversing with my host through the chat box. I was wondering what other rights I had as a participant in the session. Were there other tools I could've used? I'm sure the host would have to give me some rights during her live session if she wants the presentation to be interactive. 


  • How could this type of webcast be incorporated into the classroom?
Well, in my setting, this type of webcast would work wonderfully; it's nice to have other options to conduct our LiveLessons besides using Adobe Connect. Adobe Connect comes with many issues in terms of lagging and upload restrictions--the lagging is mainly due to mass of people using the LiveLessons and entering the rooms at the same time. Since we're making many curriculum changes for the future, it'll be nice to see some teachers use Cisco WebEx Meeting Center to hold their lessons, record microlessons, or for us to hold our meetings. Usually when Adobe Connect is down or has issue within their own networking system, we send out a note to families explaining the issue and apologize for cancelling LiveLesson. We never have a back-up plan. This type of webcasting system, which is so similar to what we already use, would be a great alternative. In the brick in mortar setting, teachers could use this type of webcast to hold tutoring sessions, one-on-one conferences with students, or to record lessons for students during snow days or days the teacher is absent so students could still learn the material in a timely fashion.


  • How might you use it with students?  As attendees or broadcasters
I would use Cisco WebEx Meeting Center and put students in the position to act as both attendees and broadcasters. As attendees, students can still chat in the boxes, use their microphones and webcams. I sure they can also use the Whiteboard (located at the top) if I give them the rights. As broadcasters, I would like for students to present on a topic we're covering or conduct the LiveLesson themselves for the day; I have done that in the past. Luckily for the teachers and students at CCA, broadcasting live is apart of our day-to-day tasks. It's scarier than presenting in person in my opinion because we're recorded, and have to manipulate technology as we present; we then hope that we don't run into any issues at the same time as well. 


Friday, April 14, 2017

Live Broadcast: Online Learning

On April 15th, at 12:00 pm, I'm hosting a Live Broadcast on the benefits of Online Learning!

Where: https://meet66957799.adobeconnect.com/r7j7g3ofj3j/

Come and learn about the benefits of Online Learning in this small presentation! 

Sunday, April 9, 2017

Integrating Social Networking

Grade Level: English 11 (11th grader)
Lesson Plan: Unit 2 Lesson 4 Edgar Allan Poe: Integrating NearPod and Edmodo 

*Due to copyright laws at CCA, I can't take any pictures of the lessons within our LMS, Connexus, and post them to an outside platform for any purpose


Lesson Plan:


Essential Questions

  • What Gothic elements are present in Edgar Allan Poe's literature?
  • What did Poe deem as the intended effect of his literature?
  •  Did Poe follow his own qualifications for short stories? 

Objectives

  • Read and analyze Poe's literary works including his letters and short stories
  • Describe how the setting contributes to Poe's intended effect
  • Evaluate Poe's writing using his own criteria
  • Demonstrate your understanding of Poe's "The Raven" in a NearPod activity 
  • To collaborate in Edmodo and create a post for peers to respond

Description
The students will complete their lesson in Connexus on Edgar Allan Poe; this lesson is for Unit 2 Lesson 4, and it should take students 2 days to complete; all lessons are already designed and assigned withing the LMS system for the entire school year. First, students will click on a hyperlink to read his Poe's letters, and then use EBSCOhost Research Database, accessed within Connexus, to research an article titled "Poe, Edgar Allan" from the Funk & Wagnalls New World Encyclopedia. Students will then use SAS® Curriculum Pathways to complete an activity using the same article. Towards the end of their lesson, students will read Poe's "The Masque of the Red Death," and then complete a 5 question Quick Check assessment based on the material learned throughout the entire lesson. 

The integration of social networking will take place during my LiveLesson, after students have already completed their Unit 2 Lesson 4 readings and Quick Check assignment through Connexus; this lesson will take place on day 2. Students will enter the room, and see the note and NearPod link; I would have sent out a webmail previous to the LiveLesson session explaining NearPod and the Edmodo activity with an invite, beforehand. Once they click on the link, they will be taken to NearPod.com and asked about a code. I will then provide the students with the code. I will also tell students to visit the link provided for Edmodo to join our English 11 group; hopefully students have already joined the group prior to LiveLesson--as requested in the webmail sent, once they've opened their invite in Connexus. A code will be provided as well. Before the start of our NearPod activity, students should have three tabs open: Adobe Connect-LiveLesson, NearPod LiveLesson, and Edmodo to our Group's Page. We will begin when all students are in the NearPod room together. 


                                                             NearPod link and Code


                                                     My LiveLesson Room (with Note and Link Pod)
                                          Edmodo Invites to be sent to each students' webmail 
                           Edmodo link that will be provided in the Notepod during LiveLesson 

NearPod
Once in the NearPod room, we will begin our activity on Edgar Allan Poe's "The Raven." I will tell students to remain focused on the tab with the NearPod LiveLesson. During this activity, we will listen to an audio of the short story first, and then hold a partner breakout session, where students will discuss tone and mood. Students will hold this discussion in our LiveLesson Breakout rooms; the number of students will dictate how many rooms I'll need. Students will be placed in the Breakout rooms randomly, and have 5 minutes to discuss their answers.  

                                                                        Objectives
                                                                           Audio Recording
                                                                 Talking with a Partner


                                         An Example of the Breakout Rooms in my LiveLesson Room

This Nearpod lesson also include multiple interactive activities requesting the students to scroll, draw, highlight, and provide answers to question posed throughout the lesson. As the instructor, I'm able to monitor those students who are actively engaged and who are participating; both the students and I can see the responses that are submitted. I will use the assessment report that's sent to my email address to evaluate which students will earn credit. Since the major project for Unit 2 is due in Lesson 11, I will simply combine students' participation points for this lesson with their Quick Check grade. 5 points will be given based on the discussion with their partner (I will save the Chat Pod dialogues in each Breakout Room), the highlighting activity, and the Q and A exercises. Those 5 points will be combined with the possible 5 points earned for the Quick Check for a total of 10 points; The Edmodo assignment will be an additional 5 points to total 20 points for the Unit 2 Lesson 4 assignments. 


                                                   Interactive highlighting exercise


Question and Answer exercise 

                                                         Requesting An Assessment Report 
Edmodo

The NearPod activity should take about 20-25 minutes; the Edmodo activity will take up the renaming LiveLesson time--approximately 15-20 minutes. Once students have read Poe's "The Raven" and have completed some interactive activities on the short story, then will go back into their Breakout Rooms. This time, depending on the number of students, they will be broken into groups of 3-4; if there are 12 students in attendance, I will create groups of 3 with 4 students in each room. I teach two LiveLessons a day (9:00 am and 12:30 pm sessions), so there will be more than 3 group postings to the Edmodo English 11 Group page by the end of the day. Students will be given 7-10 minutes to discuss the question: " What Gothic Elements are present in Poe's "The Raven"? in theire Breakout Rooms. This questions will take the notes gathered in Connexus, analysis of the Gothic subgenre, and an in-depth look at Poe's "The Raven." One student in each group will be chosen to post the group's response to Edmodo; I will ask that their names and session time be included in the post. The remaining time in class will used for each student to individually visit the posts of their peers, and respond to their answer--students will not comment on their own group's post. Students can agree with their peer's assessment, offer another perspective, or pose a question to the group. I will explain to the class I'm looking for a conversation as well. Like all assignments in Connexus, the students will have until the last day of school to complete this assignment.


Goals
-For students to engage in the NearPod LiveLesson
-For students to collaborate in teams and create a post in Edmodo
-For students to communicate with each other during the NearPod LiveLesson and in the Breakout Rooms
-For students to provide feedback on their peer's postings in Edmodo
-For students to demonstrate their understanding of Poe's literary work, and it's connection to Gothic Literature (Romanticism).


Seven Day Social Immersion Challenge

Photo-a Day

Backstory on the week...
Okay, so I want to give a backstory on my week so that my photos make some sense. In our cyber school, PSSA testing week is the WORST week in the entire school year. Admin, teachers, and students/families all know this; it's really no secret. Unlike a regular brick and mortar school, CCA teachers must go to a center or hotel conference room at a close location to hold these testing sessions around PA. We are totally detached from school during this week, having limited to no contact whatsoever with our colleagues and students for 4 -5 days. It sucks. So, I was assigned testing for this week, at a hotel in Northeast Philadelphia, and my testing hours were from 7am-6pm. Yup! Since my phone was confiscated during testing hours, I either took a picture in the morning or during the drive to the location (not while I was actually driving), or else the picture would be taken at night. 

Then--because that is not bad enough, I fell ill on Wednesday. I never...EVER...had any experience with the stomach bug or with food poisoning. So of course, on the most important week of the year, I fall victim to the stomach bug on Wednesday, at 4:02 pm, during testing. I have to tell you something, having the stomach bug and being 21 weeks pregnant is something terrible. 

So what am I'm saying...I'm saying I had a really crappy week, with the exception of Saturday and Sunday, and wished I enjoyed this experience a little more.  

The Experience and Reflection 


Monday: Vocabulary List
Tuesday: Wawa cup
Wednesday: Sink 
Thursday: Bed
Friday: Car
Saturday: Party
Sunday: Computer

Slideshow link: https://www.flickr.com//photos/149527425@N06/show/ 

The first thing I did was research the Project 365 and read up on the challenge. I wanted to do a photo-a day experiment because once upon a time, photography use to be a hobby of mine, and I lost sight of that a few years ago. Nowadays, I rarely take picture even though I have a smartphone; I happen to be one of those individuals whose cell phone is not permanently attached to their hand. On one website, I used their Project 365 tips to guide me. There tips were: 1. Bring Your Camera Everywhere; 2. Make Posting Easy; 3. Vary Your Theme; 4. Tell a Story; 5. Don't Stop, No Matter What. I decided to keep my phone with me as much as possible this week. Since I could not do this at work due to testings, I decided to just keep it in my robe pocket while at home so I'd remember to take a picture. I decided to use Flickr to upload my pictures for this assignment; I wanted to use a tool that was simple and easy to understand and orchestrate. When it came to theme, here is where I felt I lacked in trying different things. Usually, I'm really particular about the pictures I capture for the most part. In the beginning of the week, I was just taking pictures so I'd remember to take the picture. By Saturday night, I noticed I did not try to capture the best lighting, perfect zoom frame, and/or decide on the greatest angle to shoot many pictures. I wish I would have put more thought into those aspects rather than just snapping a picture for the day.

Telling a story was one that took some thought. Since I knew this was going to be a busy week, I wanted to take a picture of things that consumed my day; pictures or items that either made my day, was on my mind, or helped me in some way. With Monday's picture, my son had this major Reading Comprehension test to study for that day. I'm really big on studying, and since I had to leave earlier for work every morning this week, I told my son I was going to snap a picture of his Robust Vocabulary words, put him on speaker as I drove, and listen to him recite his words before he left for school; at red lights, I would glance at the sheet to make sure he was on point. Tuesday was my Wawa cup. I was so serious about this picture, I even wanted to capture the dirt in my car for realness. My hotel had a Wawa around back, and before testing I decided to stop at Wawa and grab a Ginger Peach Black Tea; I can have minimal caffeine while pregnant. This tea made my morning--I was beyond happy to have it before enduring the grueling hours of testing. 

On Wednesday, I did not take a picture in the morning with the intentions of simply one after I left the hotel. However, when I fell ill, I climbed into the bed and curled up into a fetal position. Thursday morning, I took my picture for Wednesday--my bathroom sink. Due to the stomach bug, I kept running to the sink all night, and sometime, I just rested my head on it before returning back to bed. Thursday's picture was my bed. I took off of work of course, woke up to help my son, and  then took my picture before falling in the bed for about 8 hours. I was a mess. On Friday, I stayed in my car. My House Warming/Gender Reveal Party was on Saturday, and since I was feeling better, I had to make so many errands; I left my home at 8:35 am and did not return until 3: 30 pm. My car is a life saver. Party day was on Saturday, so as the party was ending, I snapped a quick selfie of myself smiling because I was in a great mood (I'm having a girl! Surprise!). Lastly, on Sunday, I took a picture of my laptop. Aside from homework, my grades are due Monday (4/10) and Wednesday (4/12) I run progress reports. Thanks to PSSA testing, I'm behind in grading with over 140 items left to tackle. Yey! The computer will be my life on Sunday. 


I actually think this challenge was pretty cool. I've seen Project 365 examples, and was really impressed with the imagery captured in most of the pictures as time went one. You can tell the project has evolved for most over the span of time due to the images becoming more poignant; I would like to do a Project 365 challenge one day of one image, like of my home or children together. Flickr wasn't that bad to use too for the first time. It was easy to upload all my images, and even figure out how to view them in a slideshow. I copied and pasted the url, and then placed it in the search bar. Once the url was in the search bar, I typed in the word "show" afterwards, and suddenly this Flickr Slideshow of my images came up. My only issue was trying to arrange the images in the order I took them; that wasn't happening for some reason. I'm still trying to figure that out, along with embedding my slideshow into my blog. Overall, this was a cool experiment even though I was sick and super busy. 

Works Cited 

Project 365: How to Take a Photo a Day and See Your Life in a Whole New Way. Parabo Press. Retrieved from http://content.photojojo.com/tutorials/project-365-take-a-photo-a-day/

Sunday, April 2, 2017

Digital Story Created with a Cell Phone

The Process
Step 1: Script:


First I had to reflect on the statement: “I knew I was going to be an educator when..." For me, there were many reasons why I became an educator, so I jotted down some thoughts, and put together a script as I went along; I changed my script many times. Along with my script, I noted the order in which my images/videos would appear in my story. In the end, my script read like this:


(1.   Book of Edgar Allan Poe (Picture): I remember Edgar Allan Poe from High School. His style, his diction, his signature... it stayed with me even after I graduated.  During my first year in college, my mother remembered my love for Poe, and gave me this book. I read it cover to cover in an hour, and it was like falling in love but having no one to share it with. It was that moment when I realized I wanted to share those same emotions with others…stir up that same passion in someone else with reading, so that that’d want to relish in the amazement of stories with me. By nightfall I was already dreaming about becoming a teacher, and standing in front of my classroom discussing Romanticism, and I just knew it was going to happen.
(2.   Biology-Plant (Picture): You have to understand, I was a biology major originally; studying about the life of living organisms. I was in love with Science; I still am. However, I was not enjoying my courses as a bio major, and I realized reading that Poe book was the first time in a long time that I felt passion for something…I felt motivated to do something else…What necessarily?…I did not know. I knew the other loves of my life were reading and writing, right up there with helping people, but I still remained conflicted. My mother and grandmother were teachers, and I did not want to feel like I was living their dreams.
(3.   Temple University degree (Picture):  I followed my head and my heart, and decided to make the change. I remember it was spring of 2010, and I was sitting in the conference room, along with other students, awaiting the presentation on becoming an Education major, at the Ritter Annex building at Temple University. The presenter talked forever, and let us know, this would be a long but rewarding journey. I was very excited, until I student taught.
(4.   Student Teaching (video)
(5.   CCA cup (Picture): I started with CCA 3 months after I graduated from Temple University, and it has been an experience unlike anything I could ever imagine; virtual schooling never crossed my mind when studying to become a teacher. CCA follows the individualized learning plan, therefore, we take the time to customize the lessons and assessments for each students to suit their individual life challenges. Its overbearing work for the teachers, but so meaningful for the students. The personalize notes and simple praises from both parents and students reassures me that I made the right choice 31/2 years ago.
(6.   CCA Computer (Picture)
(7.   Children (video)
(8.   Children (Picture): My children keep me in the field of education. I treat my students the way I want teachers to treat my children, and so my students know me as an overprotecting, loving by tough motherly type. I can say too, I knew I was going to be an educator after I became a mother for the first time in 2009, and the value of children as our future leaders really weighed on me. My children keeps me going every day.
All of my images would have a voice over, and I was hoping to stay in the 3 minute to 5 minute range for the entire video.
Step 2: Checking phone requirements


I took a Digital Storytelling course at Wilkes University, and I must say it had to be one of the most challenging course I’ve ever taken. For that course, I used my Android—Samsung Note 4 Smartphone to take videos and photos and create movies. I would upload the media to my Google Drive or send it to my email address, and then download those files to my computer. Then I would upload the media using Movie Maker, move my tracks around, alter the times for each frame, and record over each track; the conversion process afterwards was another challenge in itself. Nonetheless, I knew my phone (though a bit outdated according to upgraded technological standards) could handle video and image capturing. I also knew I would be able to access Google Drive since my email address won’t allow any attachment over 20mb to be sent. Checking my phone’s capabilities was also helpful because I could determine early on that create my video and uploading it to my Blog all via the phone was not going to work.


Step 3: Selecting a Platform
My first challenge was selecting a platform to create my video. Of course my mind immediately went to tools and applications I’m comfortable and familiar with, such as MovieMaker or Adobe Sparks. I wanted to choose one of these for the most obvious reasons, and since I’ve been considered somewhat of a perfectionist, I like my finish products to be almost if not perfect. However, upon taking the advice of my instructor, I did decide to step out of my comfort zone and try something new. During the early weeks in this course, I explored both Voicethread and WeVideo; I never used either tool to create a video. I’m originally plan was to create my video using both platforms, and see which tool worked best for me in the end. Since I already had accounts with both tools, I started immediately. I uploaded my photos and images to Voicethread without any issues, and then I tried with WeVideo. I found with WeVideo, that it was more of a process. Once I uploaded my images to WeVideo, I had to drag the image to the track and then adjust the time; that was very tricky. Then if I wanted to upload a video, first I could only import them through my Google Drive to WeVideo because my computer would not let me upload them from my personal computer drive to the tool. After that, I had to find the video, in another location, and then drag them to the track. At this point, Voicethread is looking like the winner. Once all my media was upload Voicethread (which is Step 1 -Add Media), it was time Comment, Step 2, which entailed recording your voice or adding text to each piece of media. To me, it felt more like a presentation than an actual cohesive movie using Voicethread when I previewed my work. I wanted to feel like I was watching a movie, not click through slides, so I decided to go with WeVideo.

                                                                           Voicethread


Step 4: Building my Story


We were warned that creating this digital story would be a process, and I’m telling you that is an understatement; I was tempted to throw my computer out of the window about 5 times throughout the entire process. I’ve created some very complex videos before, but using WeVideo to create something for the first time was intense. When I started working in WeVideo, I was working in video mode, with tracks and many other features to create my work, and then I ran into my first challenge--arranging the tracks. For some reason, I could not figure out how to extend or retract my tracks without creating split tracks. Then, once I figured it out after 35 minutes, I was beginning to feel slightly overwhelmed with all the options and features available. I went to go save my work, and then saw the Storyboard mode option. I immediately perked up and could not believe I forgot about that option with WeVideo. I decided to switch over from Timeline Mode to Storyboard mode, fully understanding that my work would be lost and I would have to start over. So I did!

Timeline Mode

StoryMode was so much easier to work in--or so I thought, because it’s format seems to fit the purpose of creating a Digital Story so much better. I began again by importing my videos and images onto WeVideo Storyboard and then editing the times for each slide and incorporating text slides when appropriate. It wasn’t long before I ran into another issue during the audio recording. After almost an hour of believing I was clicking on the wrong thing or missing a step, I realized in Storyboard mode you can only do one voiceover that plays over the entire video--all the slides, whereas in Timeline mode, you can create individual audio recordings for each track. So, in order to do this correctly, I had to time each slide perfectly and speak over the slide with images in it’s allotted time frame before the video kept moving; of course I adjusted the time frames for each slide when appropriate. Hours later, I manage to finish my video, after several recording attempts, and hit FINISH at the top. Well, since my video was slightly over 5 minutes long, I had to upgrade my account; I remember brushing over the detail in the review because the word FREE was in big bold letters, and that’s what I focused on for the most part. Since I was not paying 30-60 dollars upgrading my account, it was back to the editing board I went. I worked very hard to condense my video, and finally was able to hit that FINISH button about 30 minutes later.  

Storyboard Mode


Step 5: Importing the Digital Story onto My Blog
The final step is uploading the finished video to my Blog. Click here to view the video!

The Reflection
Taking the videos and images with my cell phone worked well. I did not have any issues with my phone, or the uploading of the material from the mobile device to my email address or Google Drive. My struggles came when I had to decide which platform to use to create my video, and the editing process when configuring my video. Next time, I will go beyond the website to understand a tool; even creating an account and exploring WeVideo before hand did not better prepare me for this assignment. Looking at tutorials, over examples, and reading personal experiences from others, is truly helpful above anything else. I would love for my students to create their own Digital Stories in our unit on Contemporary Postmodernism; in that unit, students can be more creative with their writing, and I believe we assign a project on creating a memoir in the same unit. WeVideo would be a great tools for my students to use. I would advise they create accounts to explore beforehand, but also, review tutorials on the tools as well. So students could see beforehand a finished product, I would make sure they have access to one of my examples, and I would even make time to walk them through certain steps as well during LiveLesson. We guidance, WeVideo can be a fantastic tool to create some unique works and bring stories to life. I will definitely use this tool again.